Thursday, January 26, 2012

Drawer Knob Cupcakes

I don't know if I've mentioned this before but I love refinishing furniture. I love sanding and painting and varnishing, and as a result the girls craft box contains some interesting items. A few months ago I bought a big bag of wooden drawer knobs when I was redoing a desk for Bubble's room and the girls have been using them everyday in all sorts of ways.
Mushrooms for their fairy dolls to sit on.
Stuck onto boxes with blutac to make pretend ovens.
Moon craters for their astronauts to jump across.
Spinning tops.
I've been amazed by the creative uses they have found for them!
Yesterday we combined some of them with a recycled mini muffin tray and made some up cycled painted cupcakes for the play kitchen.

WE USED:

* Wooden drawer knobs
(we bought ours very cheaply by the bag on Ebay)
* Paint
* Blutac/sticky tac

optional:

* Recycled mini muffin or cupcake packaging
* Plasticine
* Straws
* Scissors
* Buttons, beads and small embellishments

To make the drawer knobs easier to paint we stuck them onto some scrap cardboard using blutac.

The girls then painted them in cupcake 'flavours'. They made chocolate, vanilla and some with chocolate chips in them as well.
There was lots of imaginary play at this stage with the girls pretending they were adding things as though they were making real cakes.

The painted 'cupcakes' fit perfectly into a mini muffin tray we had in the recycling craft box. Mini patty pans part filled with play dough or plasticine would work well too.

The girls decided to make some icing for their cupcakes using plasticine.

And then decorated them using buttons and beads. They looked so cute!


Bubble wanted some candles for the cakes so we could have a pretend 'birthday tea party', so we made some by cutting drinking straws into short lengths and then making flames from yellow plasticine.

Best of all these can be used over and over again and be decorated in all sorts of ways.

Happy Imaginary Birthday to you!


Wednesday, January 25, 2012

Rainbow Stacked Hearts

This Valentine's Day craft activity combines Bubble and Squeak's current interests. Bubble still loves rainbows and putting colours in 'order' and Squeak has a new found fascination with 'big and small'. Everywhere we go lately she will inform us about the size of everything; "a big tree!", "a small baby!", it's very sweet :)
This activity had a few stages that we did over a couple of days and the results look great hanging on the wall, very colourful!

WE USED:

* Thick cardboard (we cut up an old packing box)
* Blutac or sticky tack
* Paint (we used rainbow colours)
* Scissors
* Pencil/pen
* Glue

Optional:

* Ribbon
* Heart template
(we made ours by tracing heart shapes from the computer screen onto paper)
* Hole punch

First step was drawing heart shapes onto our cardboard and then cutting them out. We made six hearts, each one a bit smaller than the previous one.
I forgot to take a photo but we created a template by resizing heart shapes on PS on the computer and then tracing them onto paper from the screen (if you try this use a soft lead pencil and don't press too heavily or you could damage your screen). We then cut out the paper hearts and used them to trace onto the cardboard.

Using blutac we stuck each heart onto more cardboard so they wouldn't move around while we were painting them. You could also paint them before cutting them out but I wanted the girls to be able to feel the shapes and put them in size order themselves.

Bubble painted her hearts very precisely in rainbow colours while Squeak went all out and painted everywhere!


Once they were dry we used a hole punch to make a hole in the center top of the largest heart.

Then we began gluing and stacking our hearts. The girls sorted them into order from biggest to smallest and then stacked them together.


The end result is really colourful and has a great textured look because of all the layers.


Tuesday, January 24, 2012

Cherry Juice 'Watercolour' Painting

A few years ago we experimented with making our own Food Paint, but it has taken me until now to experiment with juice pigments - better late than never right? :D
I've been meaning to give beetroot juice a go for ages but we ended up having a dabble with some cherry juice we had reserved after making a cake the other day. This activity was very easy and something we will be trying with different juices in the future.

WE USED:

* reserved juice with a strong colour, either fresh or drained from canned produce.
(we used cherry juice but things like beetroot would also work well).
* paint brushes
* jar or cup
* paper/cardboard


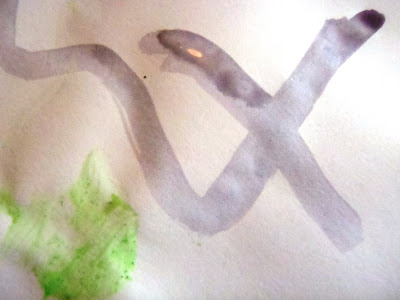
The results were actually a lot more vivid in real life, I think this activity would work better on a flat painting surface as well (the raised easel made the colours run a bit).


Can't wait to try out beetroot juice, I think the colour will be even brighter.

Sunday, January 1, 2012

Top Posts Of 2011

Wow, what a big year for our little Blog! Looking back through all of our past posts makes me smile seeing the fun and learning we've had, we look forward to sharing in more of the same with all of you in 2012.
Thank you for your emails, comments and support over a year of discovery with Bubble's diagnosis and our move to a new home, and for sharing your fun learning experiences with us as well.
These are the posts that seemed to spark the most interest from the year 2011:

Re purposed Cot Desk


Changing Faces - Toilet Roll Dolls


Magnifier Discovery Board


Paper Plate Ring Toss Game


Sensory Cards


Whiteboard Reveal Game -
The Very Hungry Caterpillar


Moon Balloons


Prime And Paint - Object Canvases


Building Block Maze


Animal Spotlight


Paper Plate Stencils


Threading Leaves


Magnetic Tree


Bottle Lid Stamps


Rainbow Party Play Date


Learning About Autism


I just want to say a big thank you to the sites who bought us so much traffic during the past year too:

Ohdeedoh
Childhood 101
Be A Fun Mum
DecoMyPlace
Money Saving Queen
Google
Pinterest
FaceBook